DOWNLOAD LINKS
https://github.com/Genymobile/scrcpy/releases/tag/v1.2 (To download Scrcpy)
https://developer.android.com/studio/releases/platform-tools (To Download ADB)
INSTALLATION
1. Extract ADB/platform-tools_r29.0.4-windows to C:
2. Extract scrcpy-win64-v1.2 to C: (Overwrite Files)
3. Enable Developer Option on Android by clicking Build number 5 times
4. Enable USB debugging on Android
5. Connect Android via USB
6. Allow USB debugging permission when USB is connected
7. On computer on CMD
8. Enter: cd ..
9. Enter: cd ..
10.Enter: cd adb
11.Enter: adb devices
12.Enter: scrcpy
BATCH FILE IN ADB FOLDER (STEP ONE TO CREATE SHORTCUT)
1. Create new Text Document in C:ADB folder
2. Enter:
cd c:\adb
adb devices
scrcpy
3. Filename: scrcpy.bat
4. Save as Type: All Files
5. Encoding: ANSI
BATCH FILE ON DESKTOP (STEP TWO TO CREATE SHORTCUT)
1. Create new Text Document on Desktop
2. Enter: start /min C:\adb\scrcpy.bat
3. Filename: Mirror.bat
4. Save as Type: All Files
5. Encoding: ANSI
Notes: The 1st video suggested merging everything in the ADB folder which I did and that's what my instructions are going by. The second video suggested creating a folder called Mirror in the C drive. Either way should work but you may have to adjust this:
2. Enter: start /min C:\adb\scrcpy.bat
Use adb if you merged all the files together.
Change adb to mirror if you created a mirror folder for the scrcpy files
Only choose one or the other.
I haven't tried it on my Mac or other operating system, but I'll update this tutorial when I do.
2. Enter: start /min C:\adb\scrcpy.bat
Use adb if you merged all the files together.
Change adb to mirror if you created a mirror folder for the scrcpy files
Only choose one or the other.
I haven't tried it on my Mac or other operating system, but I'll update this tutorial when I do.
There are lots of ways to move your files between Mac and Android devices. The easiest way is using Bluetooth File Exchange right from the menu bar on your Mac.
Transfer Android Files to Mac via Bluetooth
First, you’ll turn on Bluetooth on both devices. On the Mac, go to System Preferences > Bluetooth and make sure it shows “Bluetooth: On.” If not, click Turn Bluetooth On. You should see the phrase “Now discoverable as” and then the name of your computer in quotes.
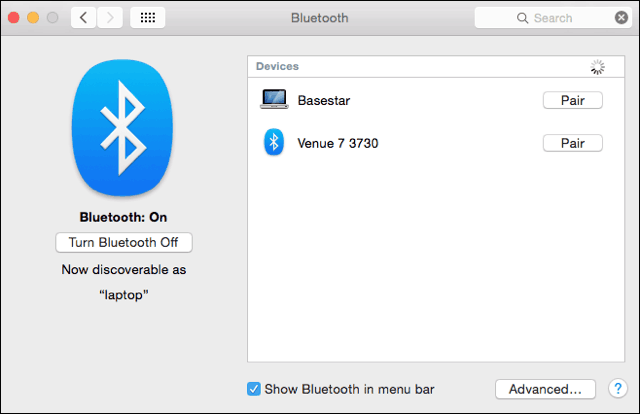
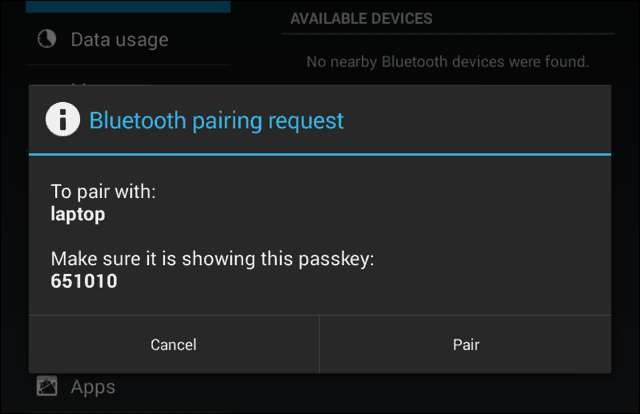
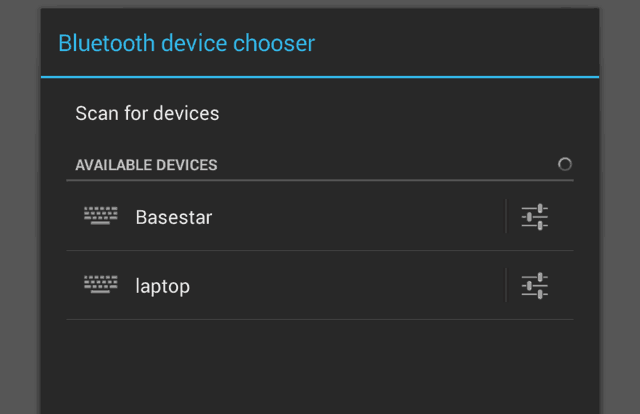
Next, on your Android device, go to Settings > Bluetooth. You should see your Mac listed. In this example it’s Basestar. Make sure the pairing codes match and click “Pair” on each device. Your Mac and your Android device now make a lovely couple.
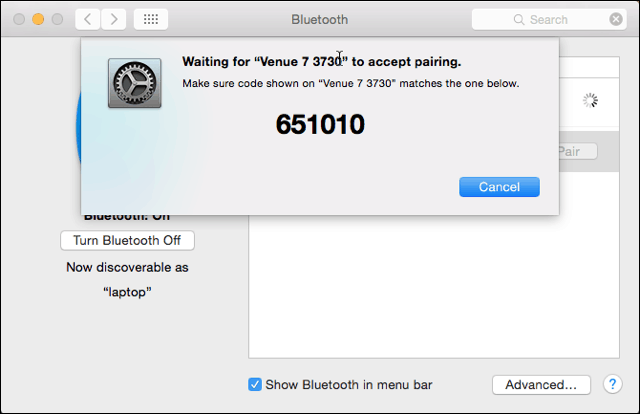
Tap on Pair on your Android device too.
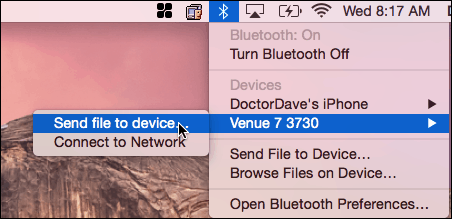
After you pair your phone or tablet to your Mac, click on the Bluetooth icon on your Mac’s menu bar. Your Android device will show up, from which you can click Send File to Device. On your Android device, accept the file.
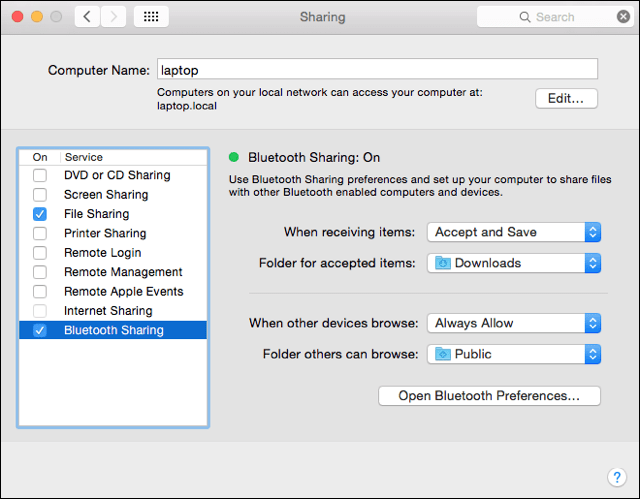
If you want to send files to your Mac, you’ll enable Bluetooth Sharing. Go to System Preferences > Sharing. In the sharing preference pane, check the box for On next to “Bluetooth Sharing.” From here, you can set where you want the downloads to go, and what to do when you get a transfer request. In this example, it goes to the Downloads folder.
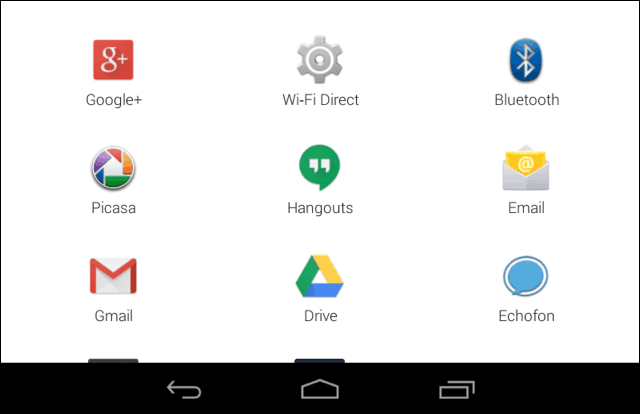
After you set up Bluetooth Sharing on your Mac, go to your Android device and click the share icon. The file will go to the folder you specified in Bluetooth Sharing on your Mac. Again in this example, it’s the Downloads folder.
Now you can move files between your Mac and Android device without cables and third-party software.
It's very simple to use and the configuration takes around 30 seconds!
Features of QuickHue Pro:
- Configure up to 6 Tiles
- Create and customize the tiles with custom names & icons
Hue Lights

This option works through the Hue Lights application. The Touchlink option is currently only built into an IOS application, if you have an droid device you will have to use Lamp Finder on a PC or MAC


Open the Hue Lights app and go to Settings then Touchlink

Make sure your light is powered on and within 1 meter of the bridge, it will not find it if it is not close enough

It will scan for about a minute and thirty seconds, if it does not find your light, try powering it off, start the scan and power it on.
Download Hue Lamp Finder for MAC, Windows, and Linux
How to Use Lamp Finder
Download and Open Hue Lamp Finder. This is a Java application so you have to have java installed, you can download it here.

Make sure the computer you are using is on the same network that your hue bridge is on and press Find Bridge.

Once it finds your hue bridge it will ask you to press the big button on your hue bridge before the timer runs out.

Before you click on Find Light, make sure the bulb you are trying to connect is moved within a 1 to 3 feet of the hue bridge and powered on. Power off all other hue lights by the light switch and then press Find Light.

If your light is found it will flash and you will see it in your Philips Hue application after a minute or so. If it does not find your light, power off the light, close lamp finder. Start lamp finder again and search for your light, while it is searching power on the light. Repeat this process until all lights are found.
Credit: Huetips
Alexa, Switch To Cable
Alexa, Tune To ____
Alexa, Go Home
Alexa, Watch ____
Alexa, Go To ____
Alexa, Show More
Alexa, Scroll Down
Alexa, Select Number _
Alexa, Watch _________
Alexa, Go Home
Alexa, Go To My Videos
Alexa, Go To Movies
Alexa, Go To My Watchlist
Alexa, Go To My Video Library
Alexa, Show Me Comedies
Alexa, Scroll Right
Alexa, Switch To Cable
Alexa, Tune to ____
How to Install Latest Adhell 3.1.1+ with new Standard Knox License Key – Adblock Samsung
adhell 4:53 PM
Method #1
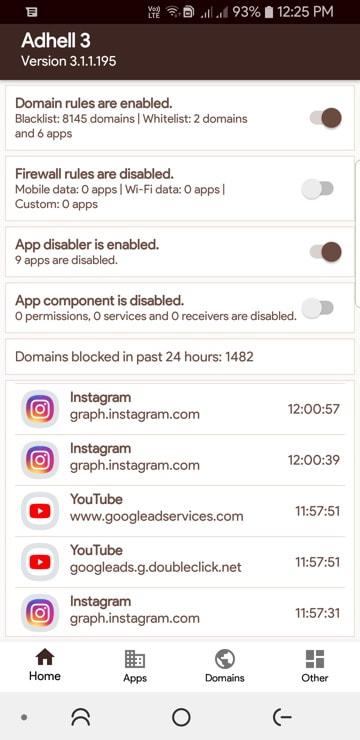
Use Adhell 3 to block ads - no root required. (Ignore all the tutorials, literally just install the apk and make and use a SKL key (Samsung Knox License) key
Method #2
How to download and install Adhell 3.1+
In order to install Adhell 3.1, you will need to download the full source code, extract it, open the project in Android Studio, and compile it to install on Adhell 3 APK onto your Samsung Galaxy device. There is no direct APK available right now.
Step 1: Generate the Samsung Knox SDK license key
Use Adhell 3 to block ads - no root required. (Ignore all the tutorials, literally just install the apk and make and use a SKL key (Samsung Knox License) key
Method #2
How to download and install Adhell 3.1+
In order to install Adhell 3.1, you will need to download the full source code, extract it, open the project in Android Studio, and compile it to install on Adhell 3 APK onto your Samsung Galaxy device. There is no direct APK available right now.
Step 1: Generate the Samsung Knox SDK license key
- Sign in here with your Samsung account.
- The Knox SDK can be downloaded here.
- Click on Generate License Key at the left option panel.
- Go to "Knox SDK" section.
- Give the key a name in "Add a key alias".
- Press "Generate license key".
- Copy the key. Note: The key generally starts with letters "KLM"
- Once generated, the Samsung Knox L:icense key can be obtained here.
- Official Adhell 3.1 from Github | Register > Login > Search "Adhell3"
Download the full source code zip from here:
- Adhell 3 Source Code Zip
- Mirror Downloads Repository For Adhell 3.1
Step 3: Install Adhell 3.1.1
- On your Samsung device, Enable USB Debugging on your phone - Go to setting > About phone > Software Information > Press rapidly about 10 times on Build Number until a message "You are now a developer!" appears. > Go back to settings > Developer Options > Turn on USB Debugging.
- Connect your phone to your PC. When you see a popup on Phonee, select always allow from this computer to enable USB Debugging.
- Download the latest Adhell master zip from Gitlab to PC or computer.
- Now extract the Adhell source zip to PC.
- Download the Knox SDK 3.1 package to PC> (Register > Login > Samsung Developer Account)
- Also, download the associated supportlib.jar Download Support Lib.
- Extract both the Knox SDK 3.1 Package and Support Lib zip to PC.
- Copy the libs folder from Knox SDK to Adhell source code app\libs folder. Similarly, all the contents of supportlib.jar to Adhell master\app\libs.
- Now we need to create the package name. To do so, create app.properties file inside app folder of Adhell 3 source app\app.properties. Open the file using NotePad++ and put package.name=your.package.name in the first line of the file.
Download the apk from Google drive. Then download the 'QuickShortcutMaker ' from Google play.
Go to the widget and choose the 'quick shortcut maker' icon, and drag to the the home screen. Tap the 'quick shortcut maker' icon and search 'record screen' . Choose the 1st one, Create the file and the 'record screen' will replace the quick shortcut maker icon. Do the second one for the record screen setting. Go to the widget, drag another quick shortcut maker to home screen , tap it and choose the 2nd record screen. Create it. Remark. The 2nd screen record is for screen record setting. Enjoy. Here's a video of what it should look like.
Credit to Xepher97
1. Install Downloader
2. Input: http://get.droidadmin.com to install Droid Admin
3. Launch Droid Admin
4. Use Code: 85810914
5: Enjoy
How to Install the Unsupported App Store to Plex
You cannot install the Unofficial App Store via the Plex Media Server itself. Instead, you need to do it manually.
The old method simply required you to download a zip file and put it into Plex’s plugins folder. However, a new version of the App Store was released in early 2016, and the installation method is now slightly more complicated.
First, download the WebTools plugin from GitHub. You need the file titled “WebTools.bundle.zip”. Once the download is complete, extract the file and ensure the extracted directory is calledWebTools.bundle.

Now move the file into your Plex plugin folder. It can be found at %LOCALAPPDATA%\Plex Media Server\ on Windows and ~/Library/Application Support/Plex Media Server/ on a Mac.

The new version of the Unsupported App Store is contained within this plugin. To access it, enter your Plex Media Server’s IP address followed by :33400, log in using your Plex credentials, and click on Unsupported App Store under Available Modules.

From the resulting screen, you can search for channels by name or category. Add the channels by clicking on Install under the channel name.
Warning: The following channels/apps are unsupported by Plex. As such, they may be unfinished, become buggy, or even stop working completely.
THE BEST ADDON FOR KODI 2016 : KOBRA APP INSTALLER FOR ANDROID TV BOX PREVIEW & INSTALLATION GUIDE
2016 8:54 AM
THE BEST ADDON FOR KODI 2016 : KOBRA APP INSTALLER FOR ANDROID TV BOX PREVIEW & INSTALLATION GUIDE
This KODI program addon will let you install the best media app available for android OS on just a click of a button.
All Top Android Application Like:
1. Showbox
2. Movies HD
3. Playbox.
4. Mouse Toggle
5. amazon fire tv cashe
and many more on a click.
Source Repo: http://kobra24.com/kobra-repository/
Share.. Like Comment and subscribe
This KODI program addon will let you install the best media app available for android OS on just a click of a button.
All Top Android Application Like:
1. Showbox
2. Movies HD
3. Playbox.
4. Mouse Toggle
5. amazon fire tv cashe
and many more on a click.
Source Repo: http://kobra24.com/kobra-repository/
Share.. Like Comment and subscribe

This is a complete setup guide to install Kodi and Fire TV Starter. This tutorial was created by people requesting a complete video for the best setup for Kodi and a complete setup for Kodi under 10 minutes!
Easiest way to watch TV, this is all your really need.
The following links were used in making this video:
http://adf.ly/14503113/yesfire1 - for Appstarter..
http://kodi.tv - for downloading the latest version of Kodi
http://fusion.tvaddons.ag - installing their build and addon.
Please Note:
*WARNING* Some of these addons may allow you to view media that you may not own or have access to. Kodi is only a program that allows you to watch tv shows and movies. Fusion is not part of Kodi and 3rd party addons are not part of the kodi foundation.
If you have any questions please feel free to contact me. 💣The Newtech Best TV Boxes for KODI Store on Amazon Always Updated💣

Lyft Driver Review (Overview)
- Driver App
- Customer Support
- Income
- Time Consumed
- Passenger Demand
Review Summary
Since
it's founding in 2012, popular ridesharing app Lyft has taken off and
become a household name. With thousands upon thousands of riders
requesting rides every day, it is no wonder the app has done so well.
While most people only experience the rider side, this review will go
into my personal experience as a Lyft driver.
4.9
In-Depth Lyft Driver Review
Overview
I drive for Lyft and this is my Lyft driver review…I have seen a lot when I have driven for Lyft. I have seen people laugh and I have seen people cry. I have seen couples madly in love and I have seen couples fighting like the world is about to end. But most of all, I have seen drunk people. Tons and tons of drunk people. But looking back on my Lyft experience, I have nothing bad to say about the company. They provide me with extra money, and I can work whatever hours I want, whenever I want. All I have to do is push the driver button and I’m in business.
Lyft Driver App
The first thing I should talk talk about before I dive into everything is the actual driver app. the app looks very similar to the passenger app, but is actually facing the opposite way that passengers see. It can be accessed by pressing the steering wheel in the upper right-hand corner of the app, which basically just tells passengers that you are available to pick them up.From a functional standpoint, the driver side of the app is minimal but very useful. You just flip into driver mode and then when a request comes, it pops up on the screen. You have 15 seconds to accept it otherwise it moves on and offers the request to the next available driver. If you accept the request you simply go to the passenger using the integrated navigation, and then press a button letting them know you have arrived.
Once they get in the car, you start the ride, which the app automatically tracks for you. When you arrive at the destination, you press another button to end the trip, rate the passenger, and you then become available again for more passengers to request a ride from you. Simple enough!
The driver side of the app is packed with resources such as your referral code, insurance and vehicle information, as well as links to the Lyft help center that answer any questions you may have. Overall, it is very well designed, both graphically and functionally.

Customer Support
I have only had a few problems in all my time with Lyft, and customer support has done a great job of helping me through them. The app is reliable for the most part, but is slow or buggy once in a while. The Lyft team is great about updating it though to give the drivers the best experience possible.I admit it, I occasionally forget to begin the trip or forget to log out and miss a bunch of requests. I simply email the Lyft team and they always fix my issues right away. In addition, if you get in an accident or a passenger throws up in your car (this hasn’t happened to me yet.. knock on wood) you simply call Lyft’s emergency number and they will immediately begin fixing the situation. It is nice to know that I have them there whenever I need them.
Income
The income that I generate from Lyft is a nice addition to the income I make at my full time job. If I drive during the weekends, I usually make $150-$200. Add bonuses to this and it can be quite a bit more some times. The average ride usually nets me between $7 and $10, but I have had rides that have earned me $60+. These are rare, but they happen from time to time. While $7 doesn’t sound like much, do that 15 times a night and you are earning some nice cash by the end of the night.If you are lucky you can hit what is called “Prime Time,” which is increased rates based on supply versus demand. If a ton of riders have the app open and are looking for a ride, Lyft will charge a percentage more based on that demand. So if a normal ride was $10, for example, with 75% Prime Time the ride would come out to be $17.50. So it is worth it to drive, especially on the weekends.
I have attached a couple of my pay statments for proof that Lyft does in fact generate a decent amount of money.


Time Consumed
The nice thing about Lyft is that you can literally drive whenever you want. All you have to do is press a button and you can start making money. I don’t know of a single job out there that allows you this same freedom. You can drive for up to 10 hours at a time, then the app will kick you off till you have taken an 8 hour break. This allows Lyft to limit the number of tired drivers on the road, simply for liability sake.Personally, I like to drive for at least 3 hours at a time. I usually get off work on Friday evening at 5 and immediately flip into driver mode. I drive for a few hours, make some extra cash (usually about $50) then I head out with friends. In the case that my friends aren’t doing anything, I simply keep driving till I get tired and usually end up with a couple hundred dollars in my pocket by the end of the night.
Passenger Demand
Passenger demand is usually pretty volatile. It all depends on when you drive and what is going on during the week. If there is a concert or sports event in town, demand spikes before and after. But during the week usually demand is not very high. That is why I tend to drive only on the weekends or the night before a major holiday. This ensures that I am not wasting my time waiting around for requests. I drove the night before Christmas Eve and demand was insane. I was on Prime Time probably 75% of the night, which made for a huge paycheck in the morning. Again, it all just depends on where you live and when you drive. For the most part though, you can make good money no matter what.Conclusion
In conclusion, I highly recommend driving for Lyft. The app is easy to use and you can drive whenever you want, making Lyft one of the best employers you could ask for. It has been a great experience for me, and a fun way to meet new people and make some extra money.Sound Interesting? Apply to drive with Lyft now!
If you are interested in driving for Lyft, apply here to get started. Lyft is currently offering bonuses of up to $500 for new riders (varies by city) so sign up now to take advantage and start turning your car into a cash machine!
How To Be A Lyft Driver
Driving for Lyft is a fun and rewarding experience that will entertain you, help you meet new people, and earn extra money. The best part? You can work whenever you want! In this article I will give you a brief overview of driving for Lyft, how to be a Lyft driver, and some brief experiences that I have had working for the company.Signing up to be a Lyft driver is easy, and only takes a few minutes. Just follow the steps and you will be well on your way to turning your car into a cash machine!
How To Apply
Step 1 – Click this link to begin the application process.Step 2 – Enter your information in the box, then click the “become a driver” button
Step 3 – Enter the verification code that Lyft will send to your phone
Step 4 – Once that is completed, just sit back and wait for Lyft to contact you. They will usually contact you one business day after applying.

Additional information to know before signing up
These are common questions people ask before signing up. If you are still on the fence, read my Lyft driver review, which details my experiences driving for Lyft! Still have questions? Leave them in the comments below and I will answer them right away!What is Lyft?
Lyft is a smartphone app that matches drivers with passengers who request rides. The passengers pay directly through the app, which charges a credit card on file for that passenger. Lyft also provides drivers with additional insurance, including a one million dollar liability insurance policy which applies in addition to the driver’s personal vehicle insurance policy, and is active once a driver is matched with a passenger.How do drivers get paid?
Drivers are paid an 80% commission on every rider fare, which gets paid out weekly via direct deposit transfer into a bank account. Riders have the option to tip the driver, which many do if they enjoyed the ride and felt safe and comfortable during it. This can add up to $50 a week, which is a nice addition to the already great money that you are making when driving.What type of passengers will I be picking up?
Most of the Lyft passengers are really fun and nice. They are down to earth individuals who like technology and keep up with common trends. If you drive during the week you will likely pick up business people, working professionals, and people that are having car issues. If you drive on the weekends, you will likely pick up lots of drunk people. And I mean LOTS. Most of the people I have picked up are pretty funny and cool, and are just looking to have a good time. There is occasionally a bad egg, but this is to be expected once in a while. Just get them where you need to go and keep driving.What are Lyft’s requirements?
Straight from the Lyft website: “You must be at least 21 and own an iPhone or Android phone. As part of our approval process, you’ll undergo a DMV check, plus a national and county background check. This will require a Social Security number, in addition to an in-state driver’s license that is at least a year old. Learn more about our background check standards on our Safety page, and our comprehensive driver requirements in the Help Center.Your car needs to have four external door handles and at least five total seat belts. You must be a covered party on your car’s in-state insurance, and have in-state license plates. We’ll confirm all of this during your 19-point vehicle inspection. Cars have Lyft age requirements too, which can vary by state. See your state-specific requirements.”
Can I rate passengers?
Absolutely! Lyft does a great job of keeping drivers and passengers accountable through their rating system. At the end of each ride, drivers can rate their passengers anywhere from one to five stars. If you rate them below three stars, you will never be matched with them again. However, if you rate them high, you will most likely run into them again somewhere down the road!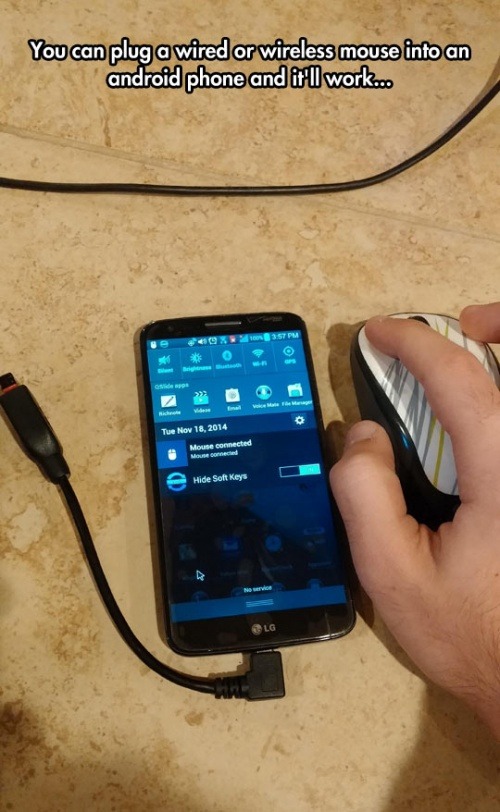
You can plug a wired or wireless mouse into an android phone and it'll work...
Fortunately, if you have an Android smartphone, then you have a way of entering extension information in your contact's details and having your Android automate the dialing process for you.
---
Tutorial Notes
Rather than manually entering a person's extension number, there is a way to automatically have your Android dial the connection once the call connects.
First, go to Contacts. If you want to create a new contact, tap the menu key and then tap New contact. Otherwise, long-press on the contact you want to add extension info for and tap Edit contact.
In the phone numbers section, either select the phone number that you want to add extension information to or add a new number.
Now, press the symbols key in the lower-left of the keypad. You'll notice the buttons Pause and Wait here. Pause inserts a two-second pause while Wait will wait until the call connects.
Insert a Wait after the phone number. Now, press the numbers key and enter the extension that you'd like to dial.
Some phone systems require that you enter a number before entering the extension. For example, if you need to press 1 before entering an extension, then you'll need to add a 1 and then a Pause after your Wait.
Now when you call your contact, you'll be asked whether you want to use the tones that you entered for that contact.
Ok guys n gals, so I've found out how to do this. Before you continue any further, understand that you must be rooted and running a custom ROM that supports 4G toggling (i.e. AOKP).
Step 1: Download this app from the Play Store https://play.google.com/store/apps/details?id=com.intangibleobject.securesettings.plu gin&feature=nav_result#?t=W251bGwsMSwxLDMsImNvbS5p bnRhbmdpYmxlb2JqZWN0LnNlY3VyZXNldHRpbmdzLnBsdWdpbi Jd
Step 2: Open the app, go to Options and scroll down to Custom ROM Actions and ensure that "LTE" is checked
Step 3: Open up Tasker and create a profile entitled 4G On and choose your first context, whether that be battery or whatever else you want to "trigger" 4G to be set as "On."
Step 4: Click New Task at the top of the tasks list and name it 4G On.
Step 5: Click the + button and scroll to Plugins and you will see Secure Settings. Click it.
Step 6: You will see edit configuration; click edit
Step 7: Now you will see a list of the options you have enabled in Secure Settings. We care about 4G, so scroll down to LTE and click it. Then it will ask you what state you want LTE to be in. This is the 4G On profile, so click On. Save and apply the task.
Step 8: Repeat steps 3-7, but now choose the context you want for 4G to be off, name your profile and task 4G Off, and when you get to the configuration settings in Secure Settings, make sure you check Off for the state of LTE. Save and apply the task.
Now you're done! Make sure to click the checkmark on your profiles screen to ensure that your tasks are enabled
Source
Step 1: Download this app from the Play Store https://play.google.com/store/apps/details?id=com.intangibleobject.securesettings.plu gin&feature=nav_result#?t=W251bGwsMSwxLDMsImNvbS5p bnRhbmdpYmxlb2JqZWN0LnNlY3VyZXNldHRpbmdzLnBsdWdpbi Jd
Step 2: Open the app, go to Options and scroll down to Custom ROM Actions and ensure that "LTE" is checked
Step 3: Open up Tasker and create a profile entitled 4G On and choose your first context, whether that be battery or whatever else you want to "trigger" 4G to be set as "On."
Step 4: Click New Task at the top of the tasks list and name it 4G On.
Step 5: Click the + button and scroll to Plugins and you will see Secure Settings. Click it.
Step 6: You will see edit configuration; click edit
Step 7: Now you will see a list of the options you have enabled in Secure Settings. We care about 4G, so scroll down to LTE and click it. Then it will ask you what state you want LTE to be in. This is the 4G On profile, so click On. Save and apply the task.
Step 8: Repeat steps 3-7, but now choose the context you want for 4G to be off, name your profile and task 4G Off, and when you get to the configuration settings in Secure Settings, make sure you check Off for the state of LTE. Save and apply the task.
Now you're done! Make sure to click the checkmark on your profiles screen to ensure that your tasks are enabled
Source
It's a modern day nightmare to accidentally reveal too much information on Facebook. I've inadvertently told the world my location more times than I can laugh off, and my friends haven't fared too well either. Just take a look at the requested app permissions next time you're about to click install and you'll quickly realize how much that app can reveal about you.
With social media privacy concerns a hot topic, especially since Facebook's psychological experiment went public, users need a better way to control app permissions before something very private accidentally spreads online.
Today, I'll show how any Android user—rooted or not—can lock down their Facebook app permissions to keep privacy secure. This tutorial is broken down into two sections: those who are rooted and those who are not, so be sure to know which steps apply to you.
For Non-Rooted Users
We'll be installing an app outside of the Google Play Store, so be sure to enable installation from "Unknown Sources" on your device before continuing.
Step 1: Download the Modded Facebook APK
Tap this link to download a modded .apk of the Facebook app. The mods from XDA member elesbb gives fewer permissions to Facebook, that in turn, keeps your privacy secure.
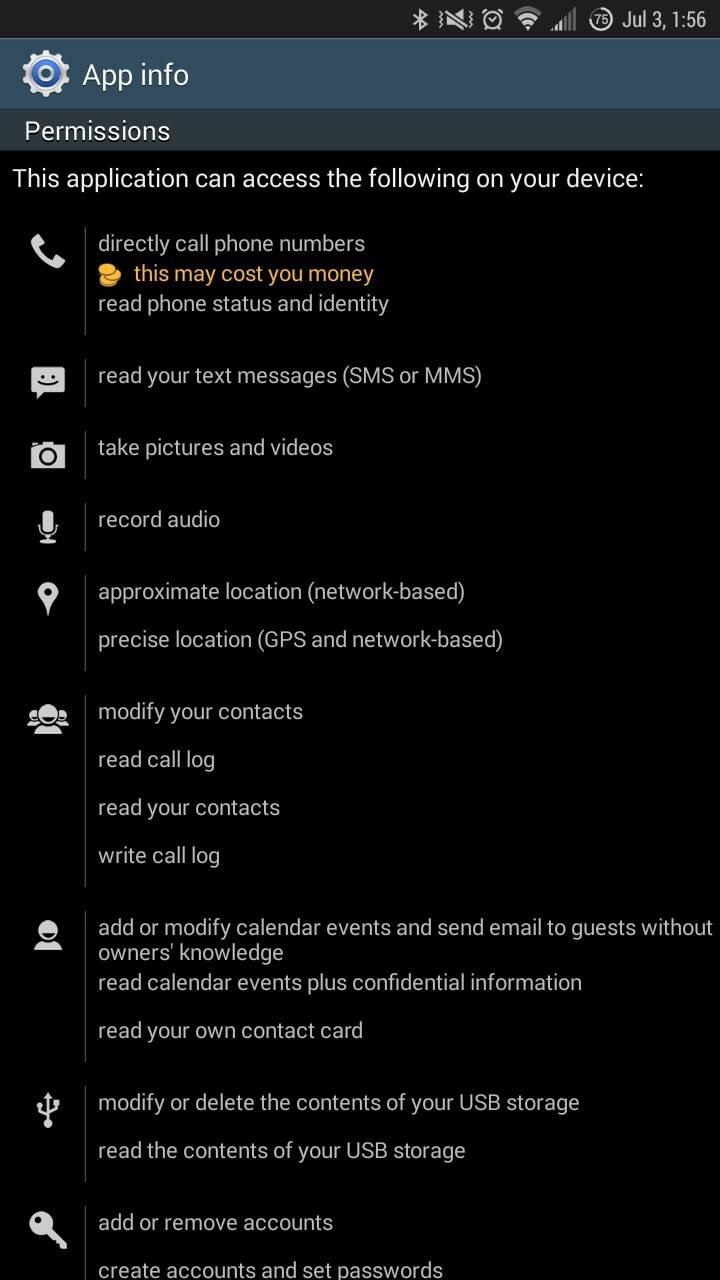
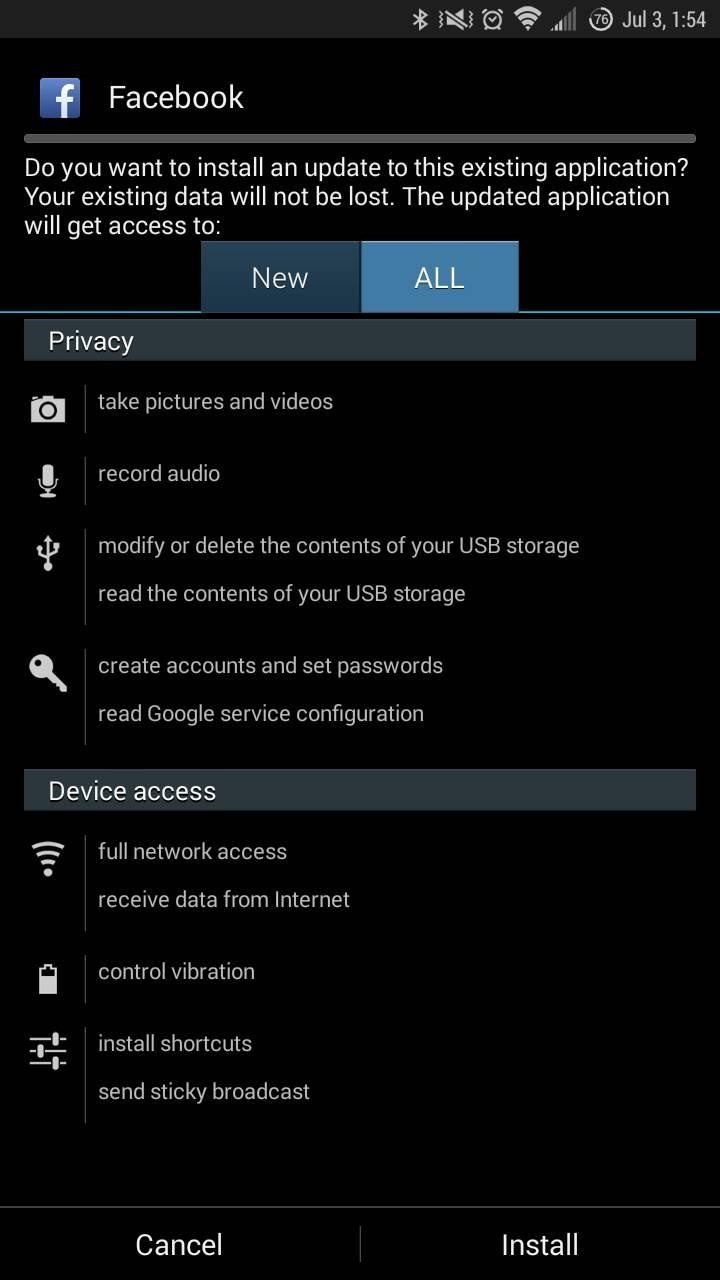
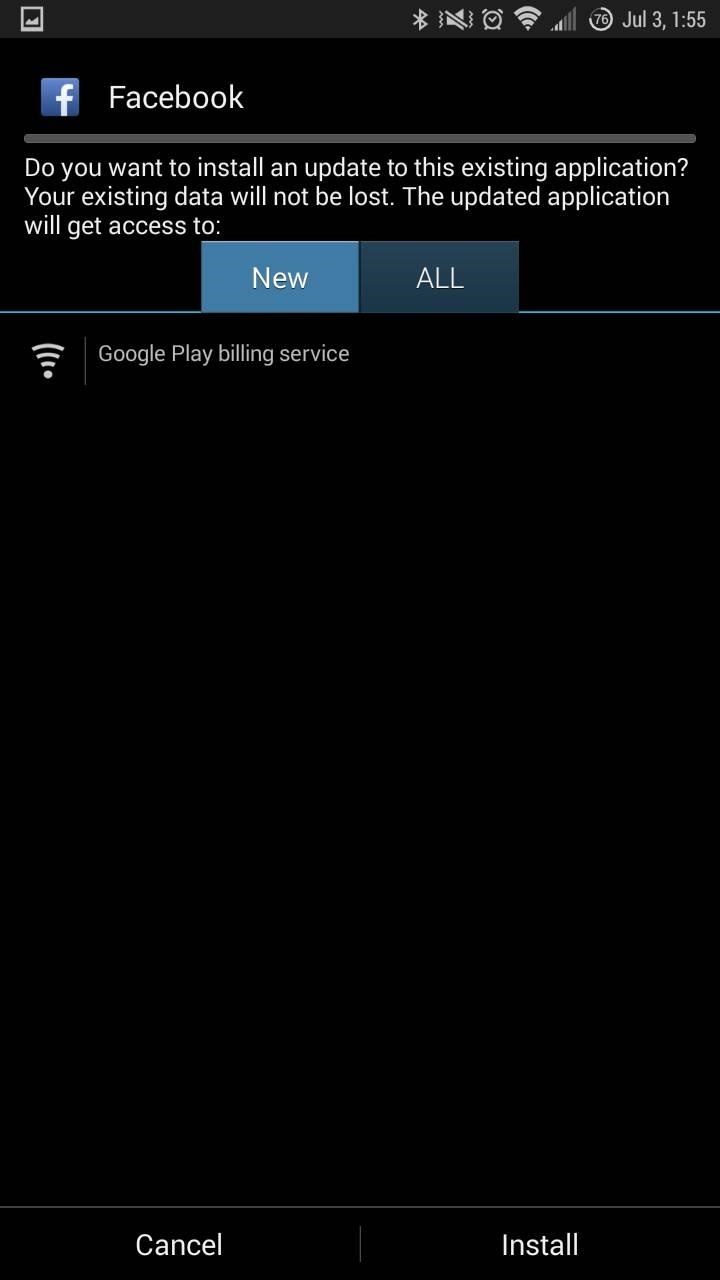
[1] Standard app (only the first page of permissions). [2] Modified app above. [3] Modified app below.
For an even more stripped-down, minimal version of Facebook, tap here to grab an even further modded Facebook app from the same dev. This one has cross-app communication (logging in with Facebook) removed, which may or may not be desirable. Personally, I like the easy login process using my Facebook account, so this version's not for me.
Step 2: Uninstall the Current Facebook App
If you currently have the standard Facebook app installed on your device, go ahead and uninstall it before moving on.
Step 3: Install & Use the Modded Facebook APK
This part's easy. Pull down on your notification panel and tap on the completed download notification to install whichever one you downloaded in Step 1 above. If you happened to clear your notifications, you'll find these files in your Downloads folder (accessible through any file browser or theDownloads app).
Once installed, open the app, sign in, and use like you normally would.
For Rooted Users
We've covered Xposed countless times here, and it's a favorite on our phones and tablets. Those who are unfamiliar with the modding tool should check out our guide to installing the Xposed Framework on your Samsung Galaxy Note 3. Although it's over in our Galaxy S5 section, it works for all Android devices.
Step 1: Install AppOpsXposed Module
AppsOps was once a standard feature that allowed control of permissions on a per-app basis, but was removed in Jelly Bean. Since I'm running 4.4.2 KitKat on my Note 3, I'll need to bring back AppOps so the permissions manager can be used, and developer caspase has the module to do just that—AppOpsXposed.
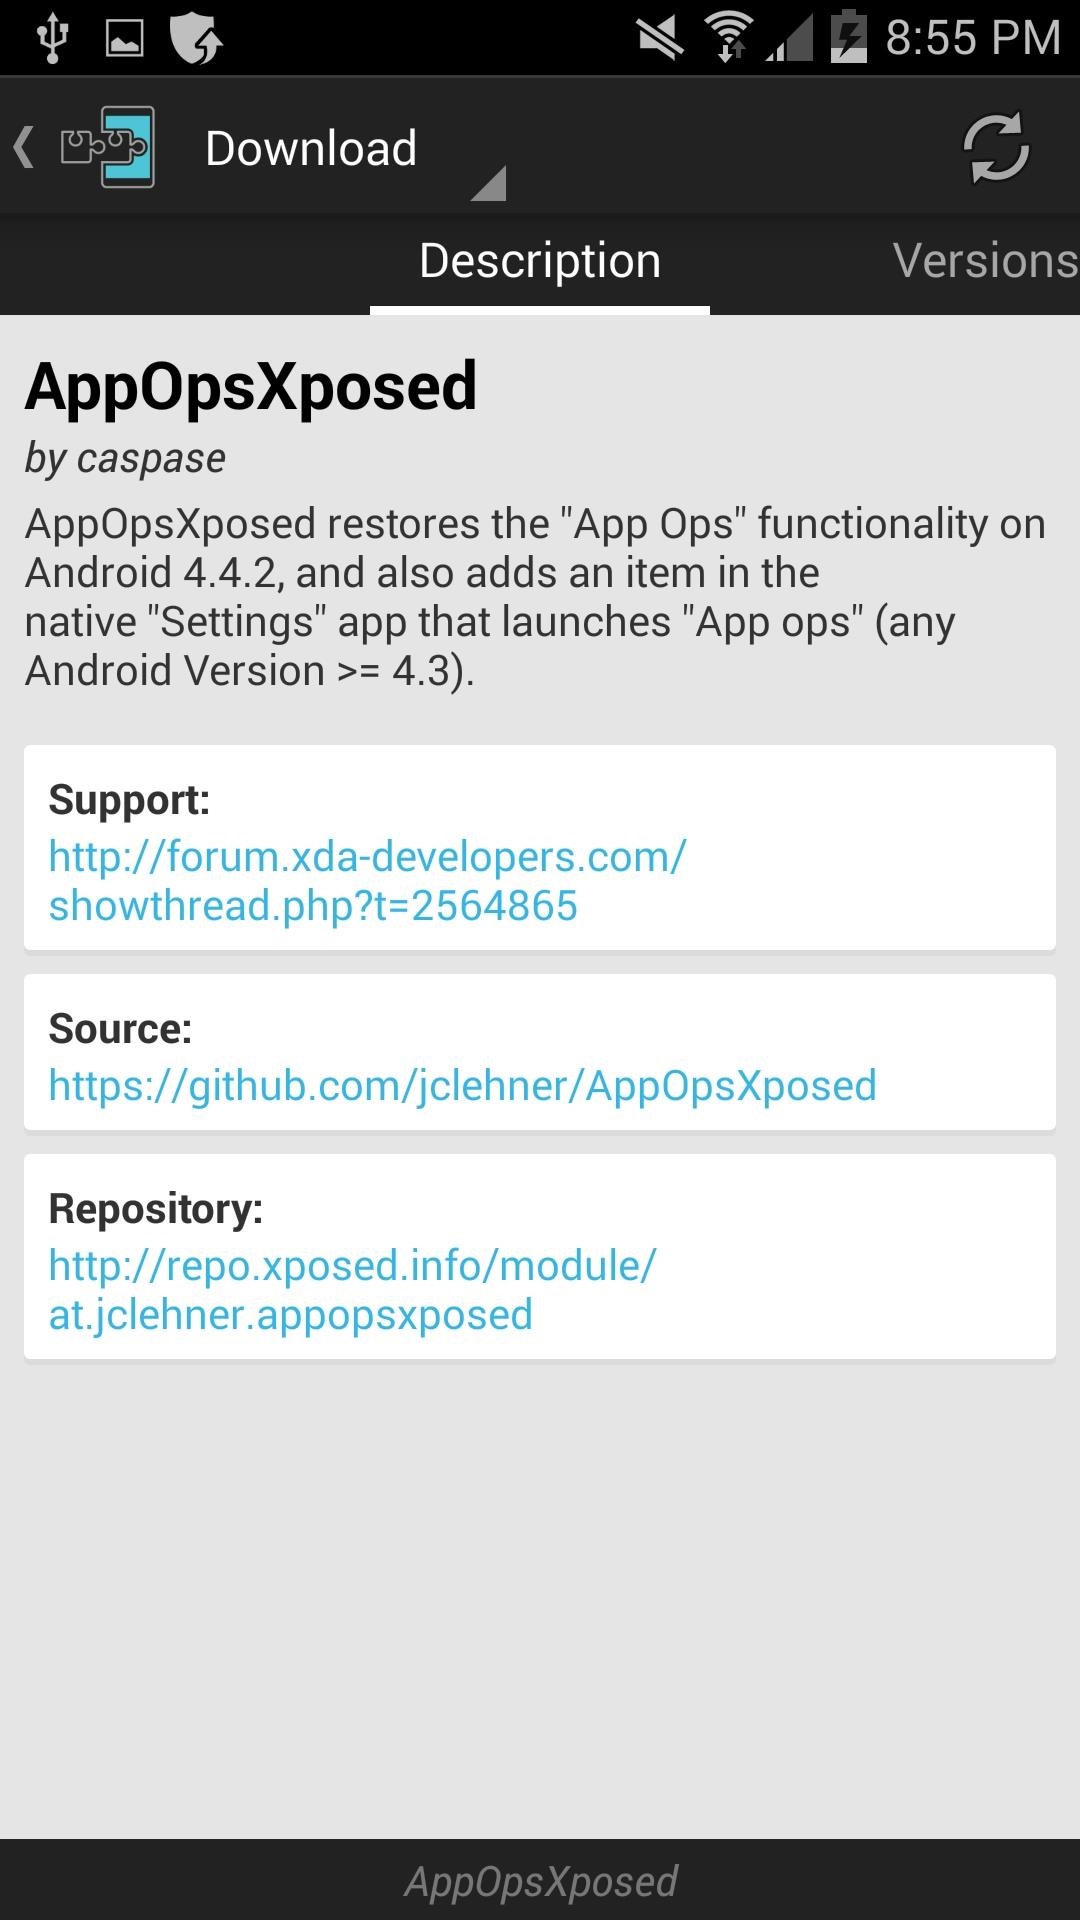
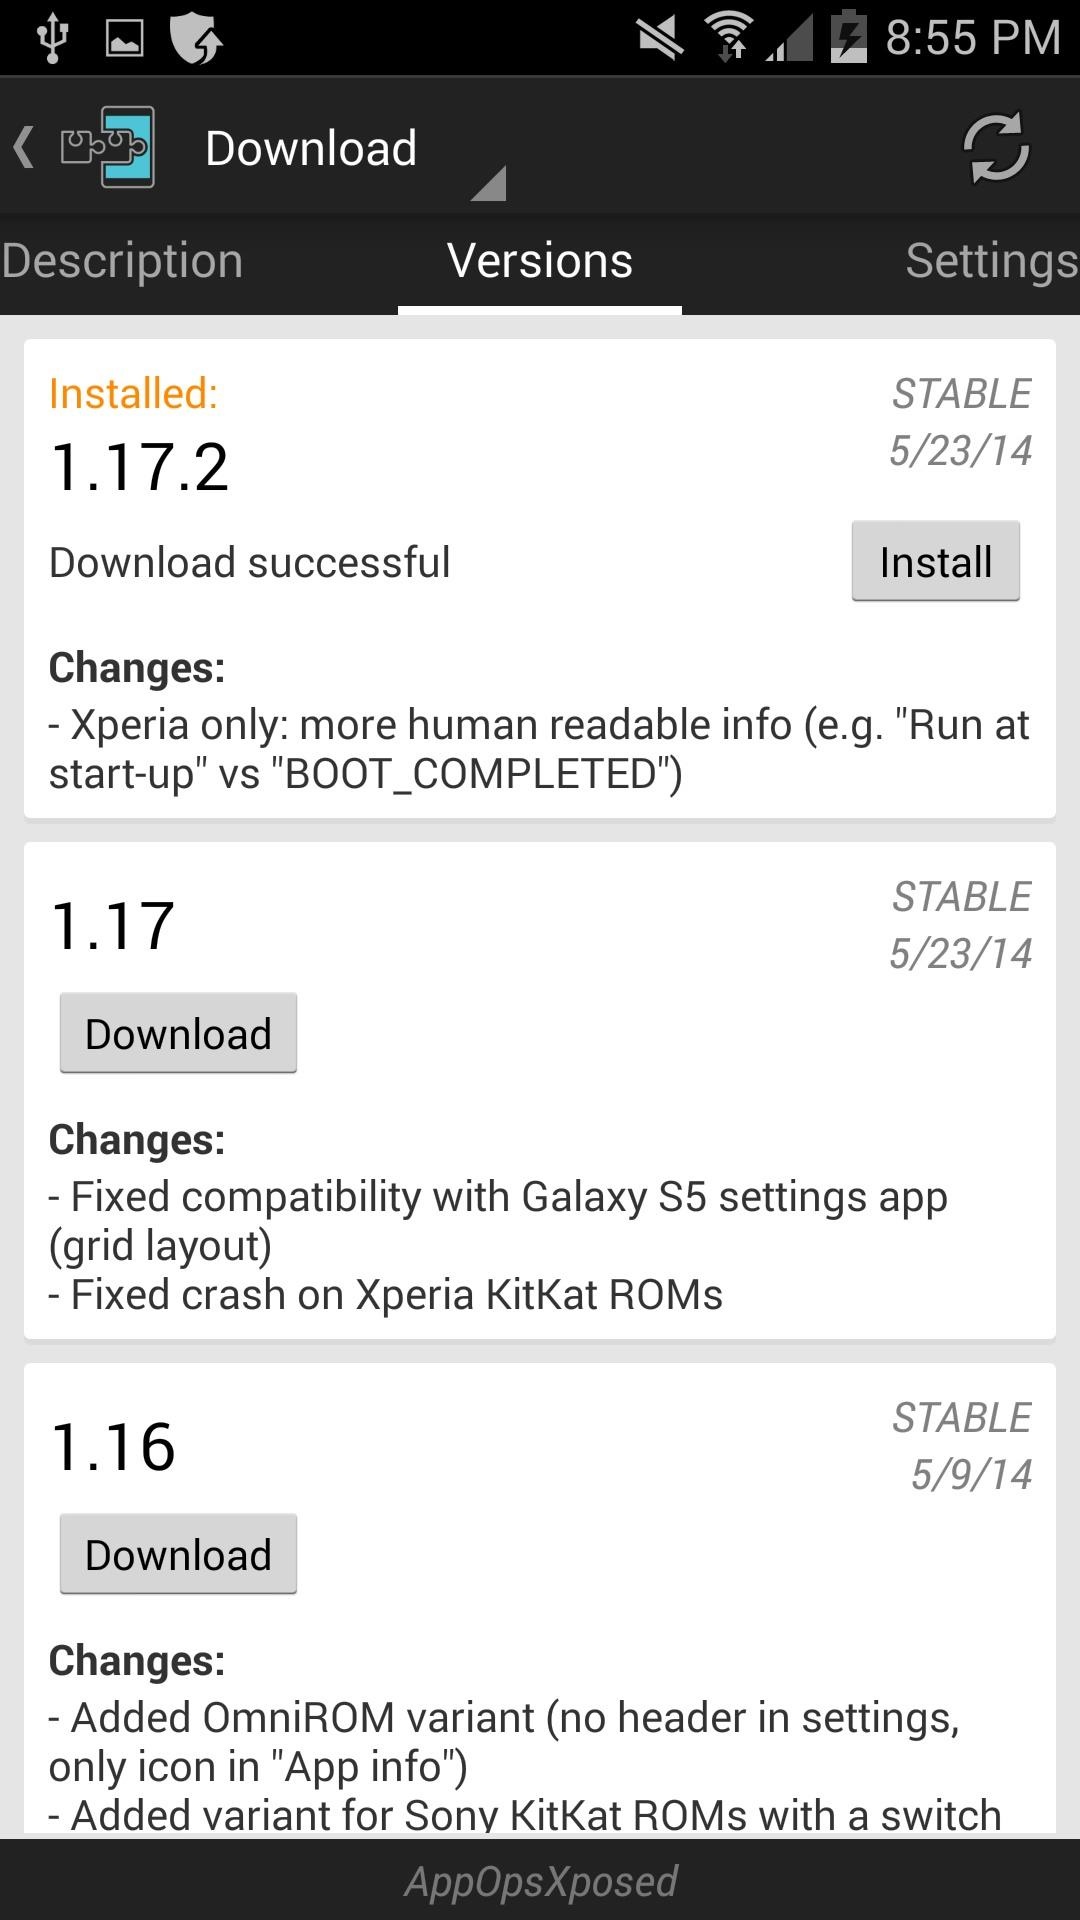
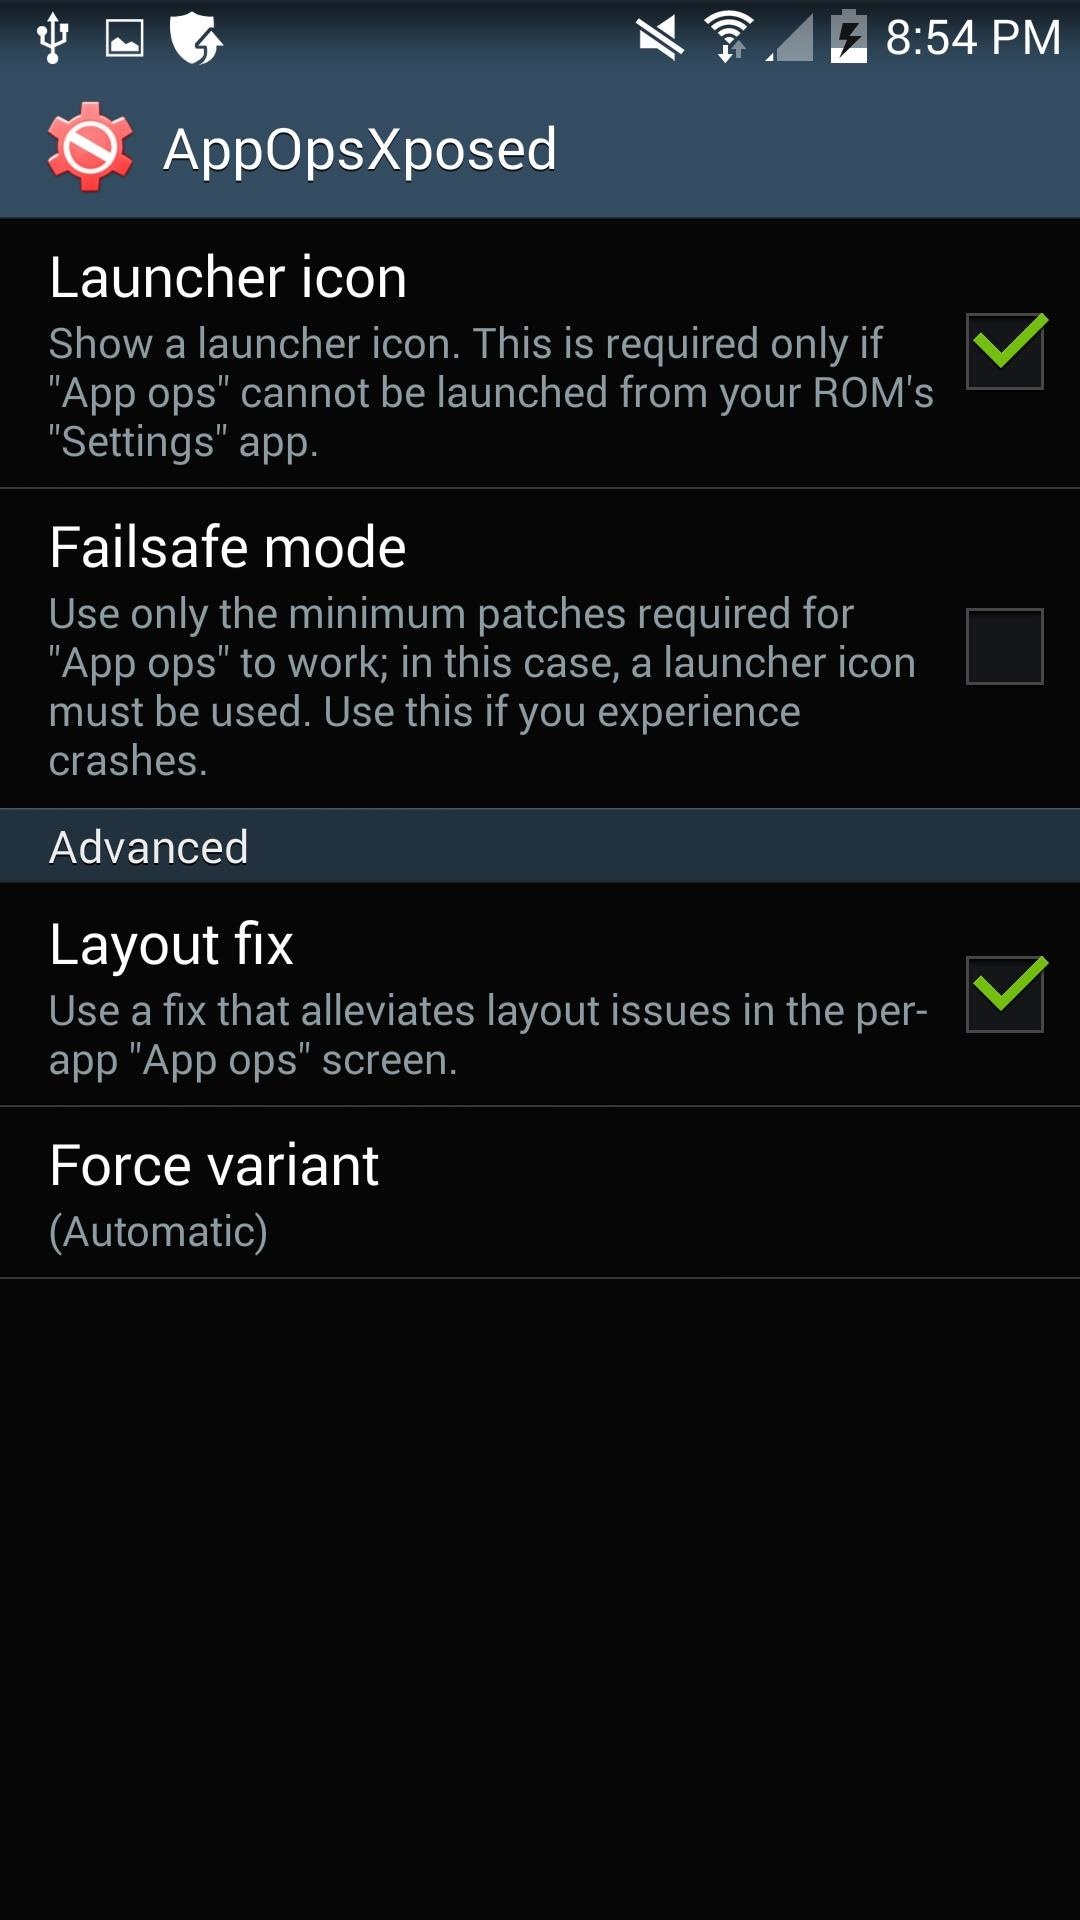
Just search for and download the app in Xposed, or get it directly from here. To activate it, make sure to reboot your device.
Step 2: Using AppOpsXposed
Launch into AppOps with the AppOpsXposed icon, or through your Settingsapp, then find and tap Facebook to see its permissions. Now just switch off whichever permissions you're uncomfortable with.
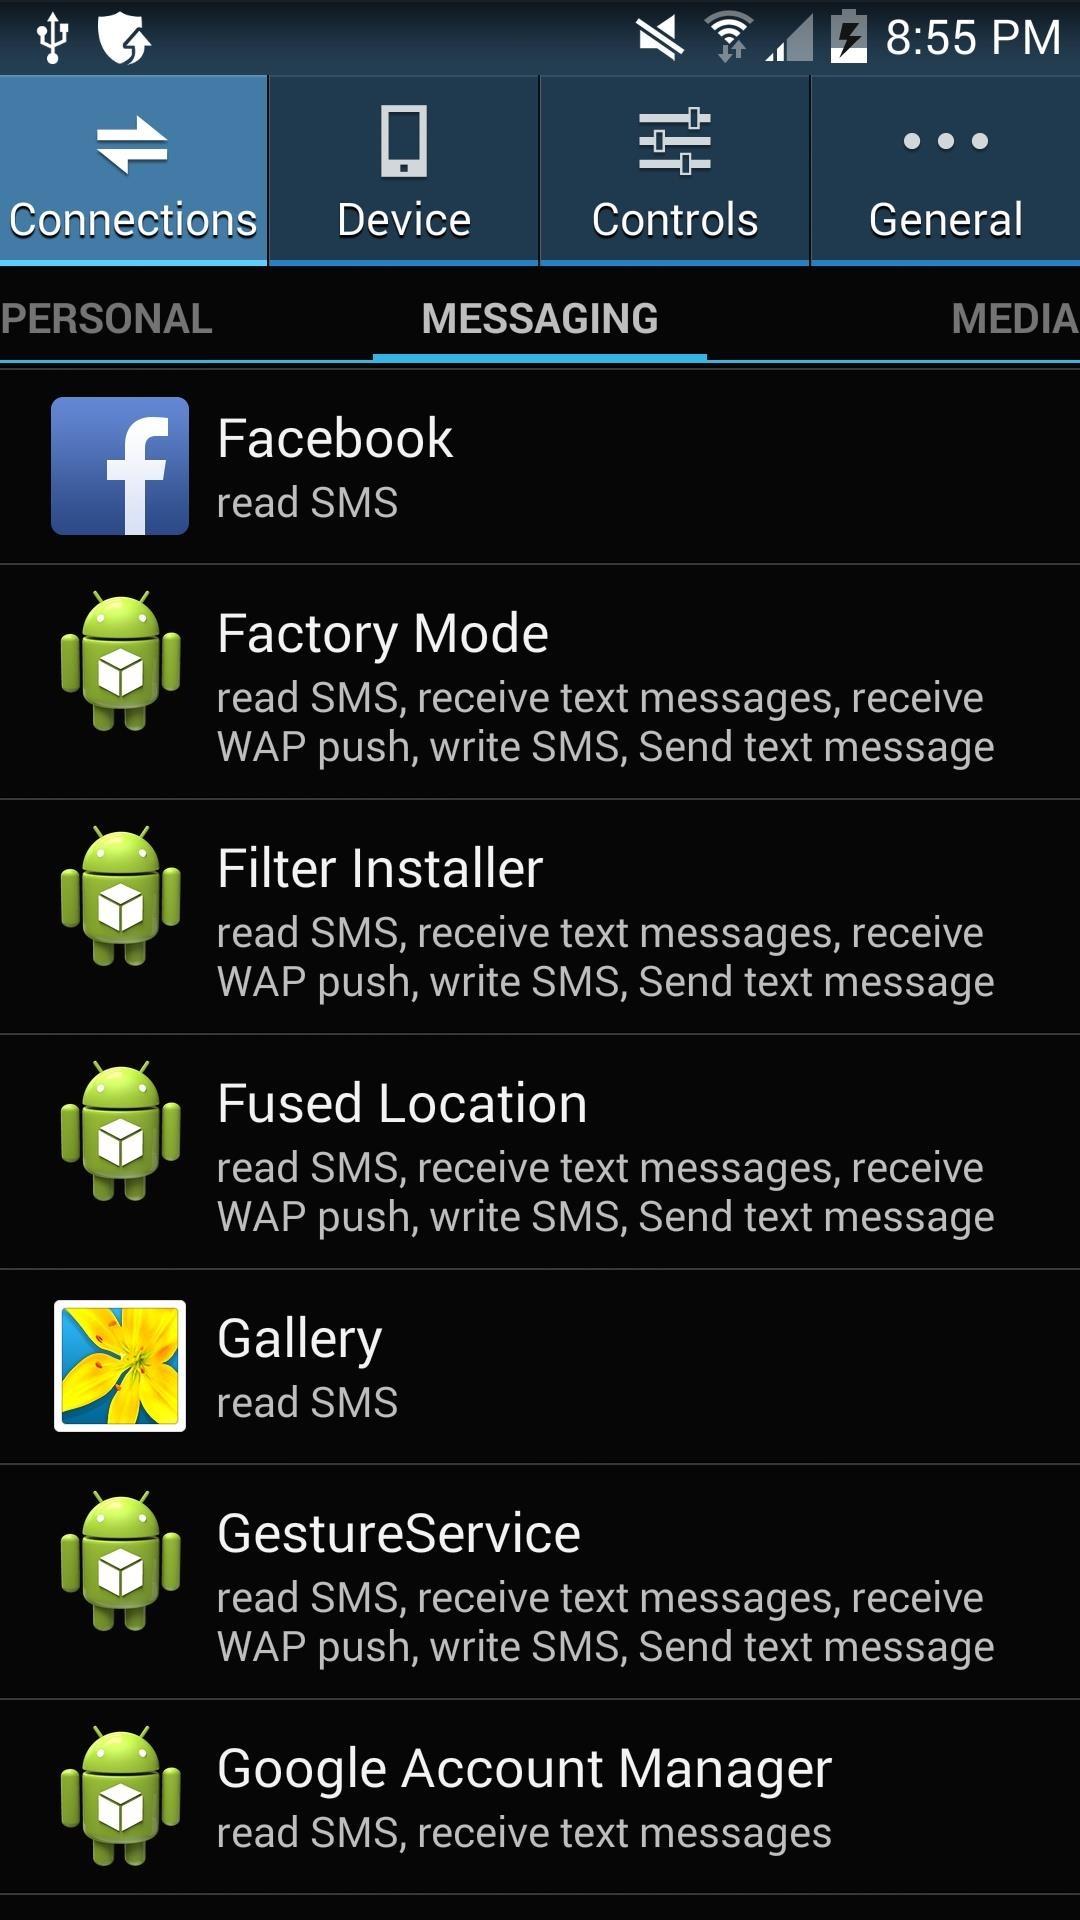
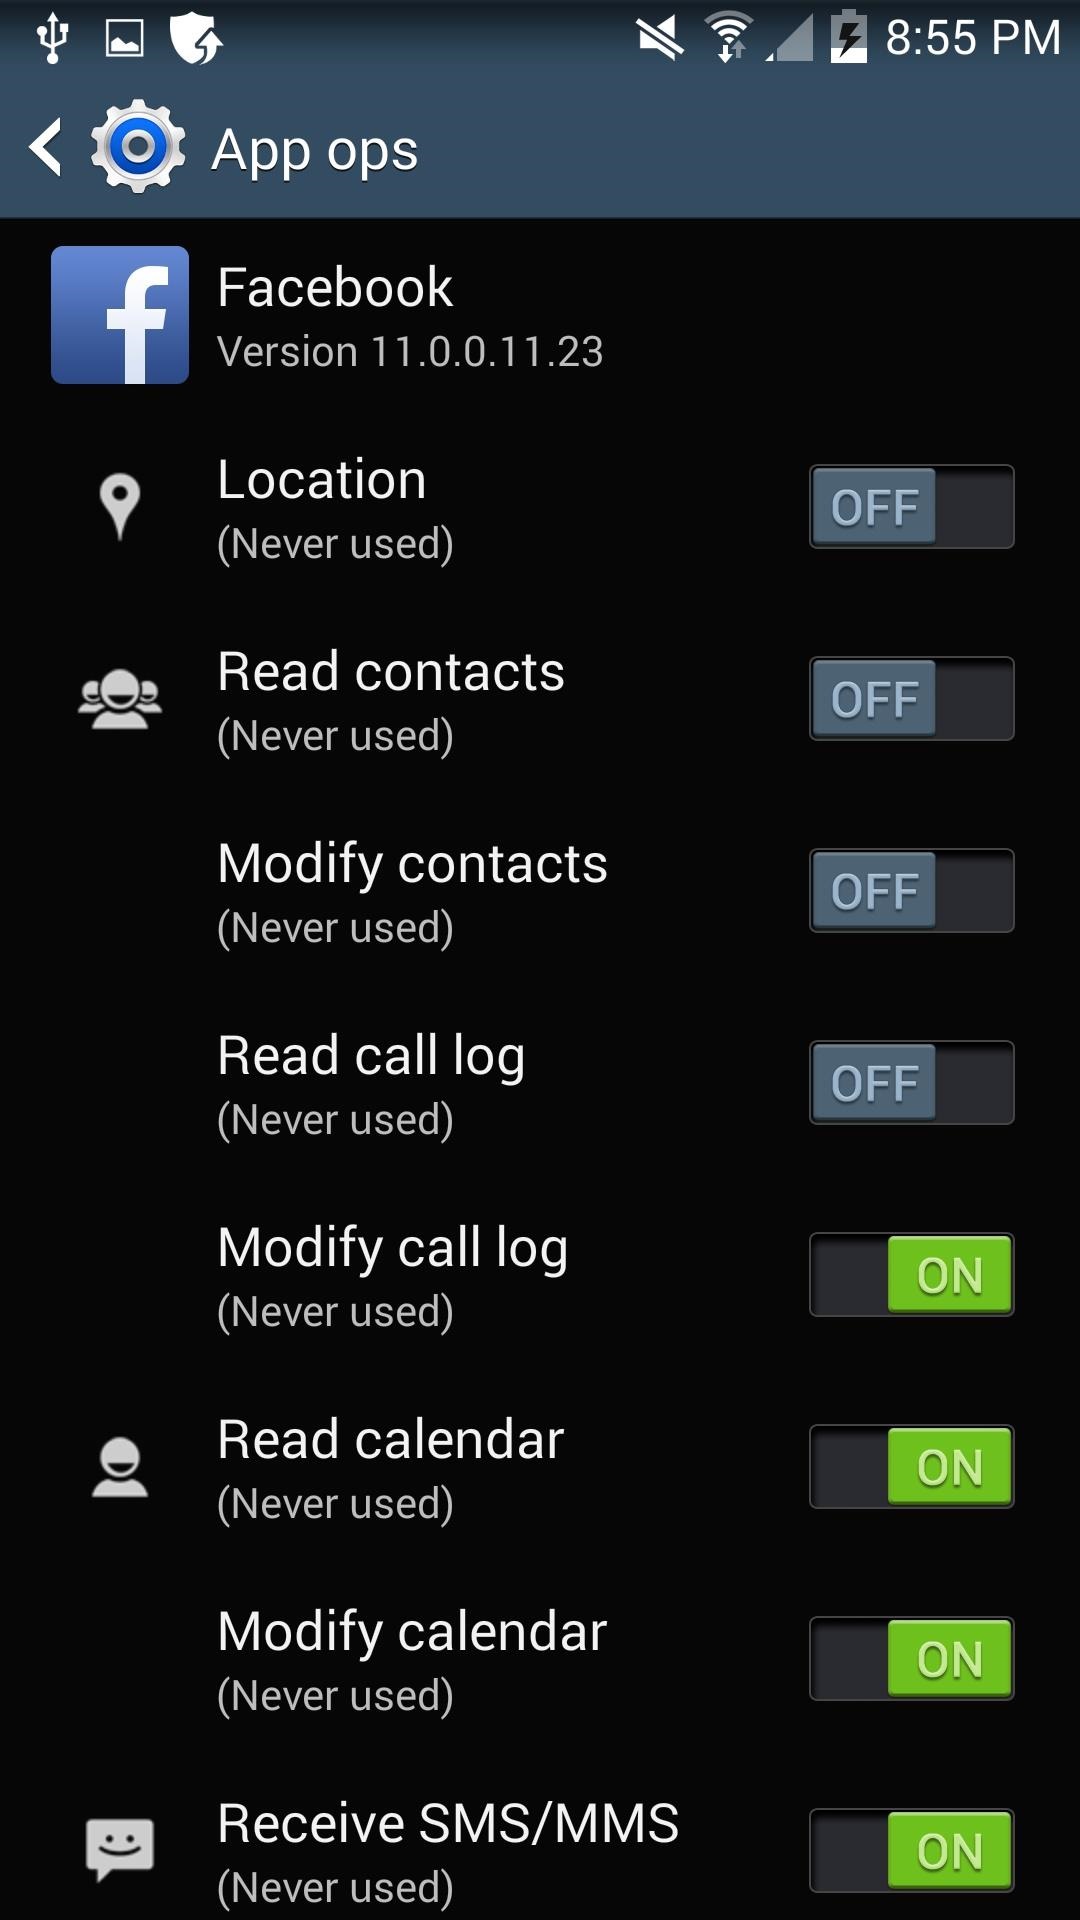
Some permissions are essential to getting your News Feed to load, so don't turn everything off. But things like reading call logs, texts, calendar, and contacts are all safe to disable. If you find that something in the app breaks, just turn back on the permissions from Settings.


